
You can take a screenshot on your Android, apple iphone, and even the brand-new Windows 11 operating system. Taking screenshots comes in handy and can be a time-saver, specifically when you require to demonstrate something that would otherwise be difficult to explain in words.
On Windows 11, you get a built-in device and a couple of totally free third-party choices to catch and share screenshots with others. Thus, this post will detail minority finest and easiest methods to record screenshots on Microsoft’s brand-new Windows 11 Let’s take a look at.
1 Take a Screenshot utilizing the PrtSc crucial
Although there are lots of ways to take a screenshot in Windows 11, the handiest option is the PrtSc switch on your keyboard. No matter which Windows variation you utilize, you can instantaneously push the PrtSc key to capture a screenshot.
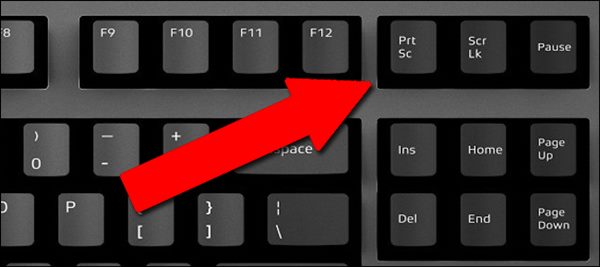
The only downside of the PrtSc feature is that it just captures the products displayed on your current display. You won’t have the ability to catch long scrolling screenshots or certain areas with PrtSc. If you only press the PrtSc secret on your keyboard, the screenshot will be minimized the clipboard. You need to open the Paint application to paste the screenshot you recorded.
To take a screenshot, open up the display you intend to record and push the PrtSc key. This will catch the screenshot; next off, open the Paint app and press the CTRL + V button to paste the screenshot.
2 Take a Screenshot using Windows + PrtSc Key Combination
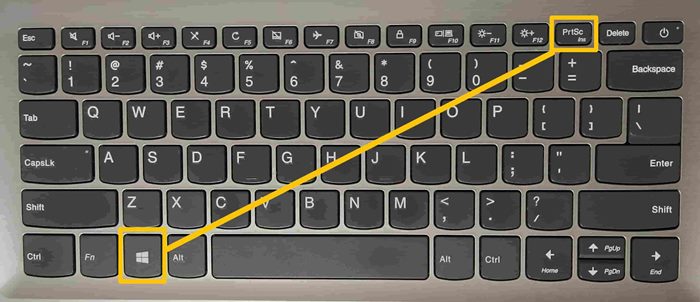
If you do not desire PrtSc to conserve screenshots to the clipboard, use this key mix. Pushing the Windows + PrtSc Trick with each other catches the screenshot, which is after that conserved to the Pictures > > Screenshot folder.
3 Make use of the PrtScn with OneDrive
The OneDrive customer for Windows has a feature that immediately conserves the screenshots in the OneDrive cloud folder.
We stated this because it differs slightly from the basic PrtScn option. It does not need opening an app and pasting the screenshot from the clipboard.
You require to set up the OneDrive customer to instantly conserve screenshots that you catch to the OneDrive Screenshot folder. Below’s what you need to do.
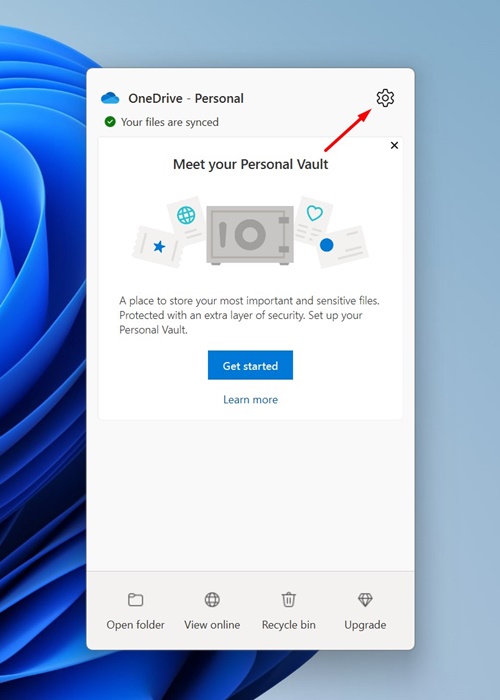
1 To get going, right-click on the OneDrive customer on the taskbar.
2 Next, pick Settings to open the OneDrive client.
3 In the OneDrive Setups, change to Sync and Back-up
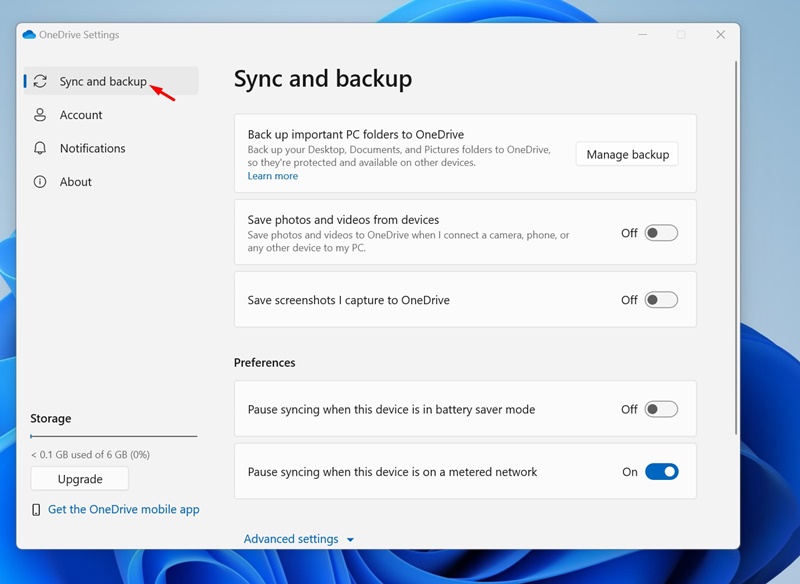
4 On the appropriate side, enable the toggle next to Conserve screenshots i capture to OneDrive
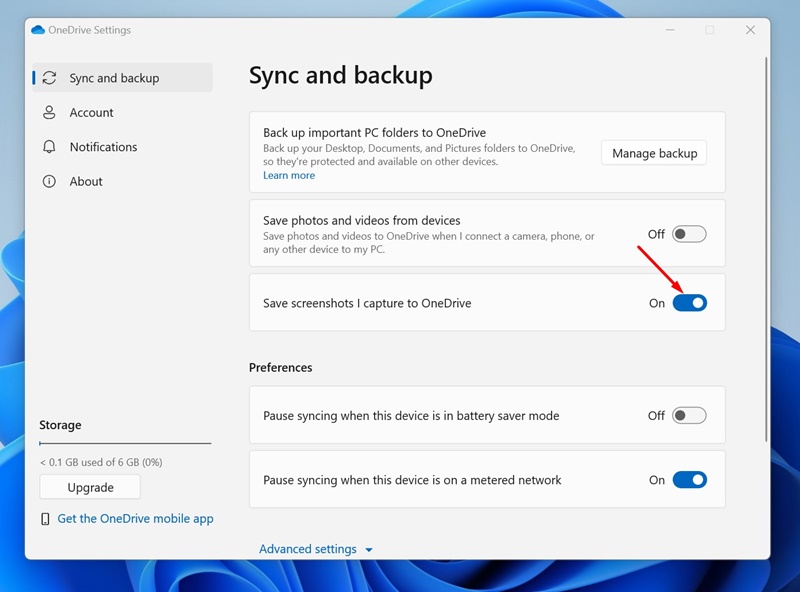
After making the adjustment, press the Publish Display vital to capture a screenshot. As soon as recorded, the screenshot will certainly be automatically conserved to OneDrive. You can access the saved screenshots from any kind of device.
4 Using Snipping Device
Trimming Device is a built-in utility of the Windows os that records screenshots. The Snipping Device function is available on Windows 10 and 11 operating systems.
To use the Snipping Tool on your Windows 11 running system, comply with some basic actions below.
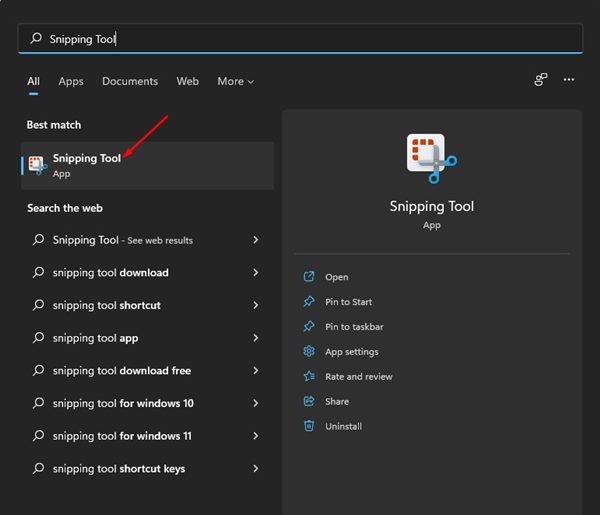
1 Initially, open Windows 11 Browse and key in Clipping Device Next, open the Snipping Tool from the listing.
2 Additionally, press the Windows + Shift + S crucial on your key-board to release the Windows Snipping Device.
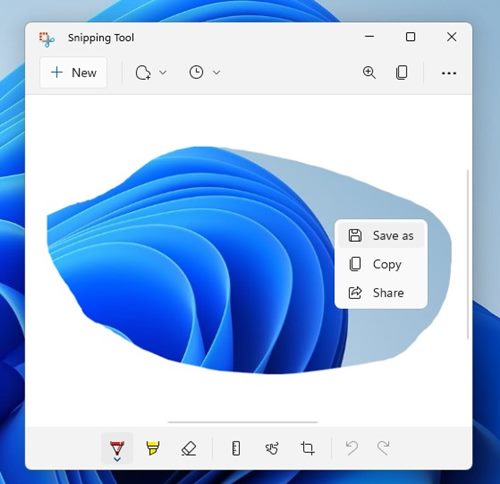
3 You will certainly find 4 display capture options: Rectangular Snip, Freeform Snip, Window Snip, and Fullscreen Snip

4 Relying on the type of screenshot you intend to capture, pick the alternative and capture the screen.

5 You can currently see the screenshot. Right-click on the image and pick Conserve as to save it on your storage gadget.
5 Capture Screenshot making use of the Xbox Video game Bar
In this method, we will use the Xbox Video game bar to take a screenshot in Windows 11 However, to use the Xbox Game bar, you require to enable the attribute on your device. For that, follow our overview–
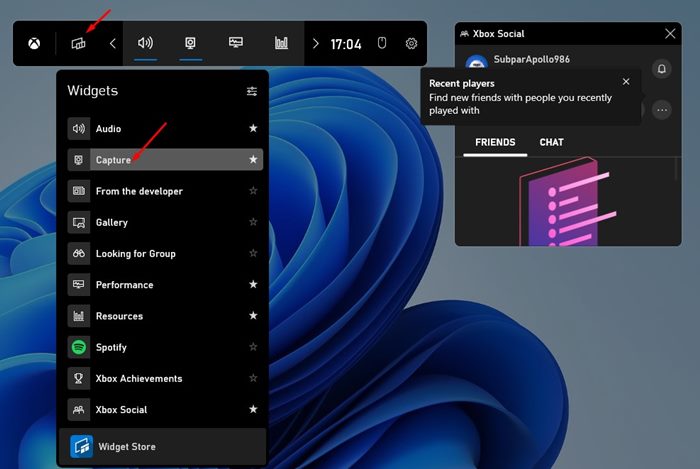
1 First of all, press the Windows + G vital on your key-board. This will certainly open up the Xbox Video game bar on your device.
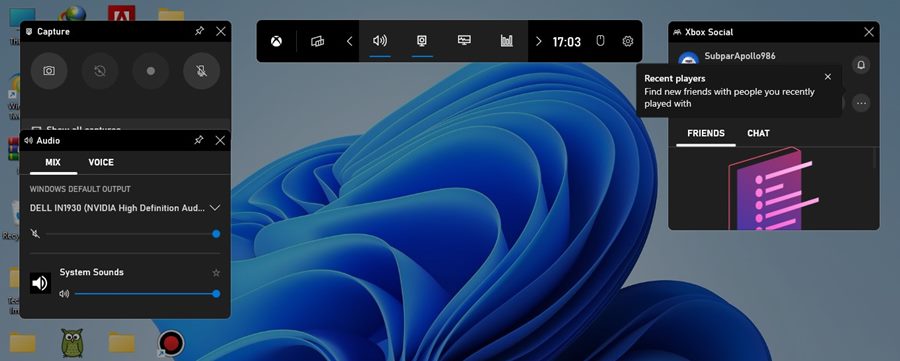
2 On the top, click the Widgets alternative and choose the Capture Widget
3 On the Capture Widget, click the cam symbol to catch the current app or desktop computer.
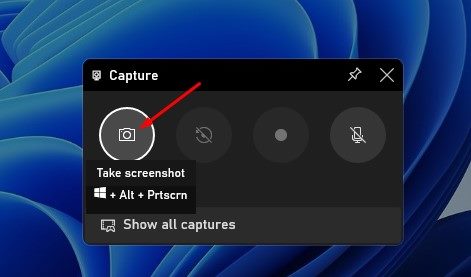
4 The caught screenshot will be saved to C: Customers [username] Video clips Catches folder Search the folder, and you will locate your screenshot there.
Catching screenshots on Windows 11 with the Xbox Video game bar is easy, and the most effective component is that the energy is totally free to use.
6 Catch Screenshot utilizing Lightshot
Lightshot is a third-party screenshot energy that’s exceptionally lightweight and totally free. You can rely on the Lightshot utility to capture screenshots and annotate the pictures. Here’s how to utilize Lightshot.
1 To start with, download & & set up Lightshot on your Windows 11 computer system.

2 The Lightshot application icon will be contributed to the system tray
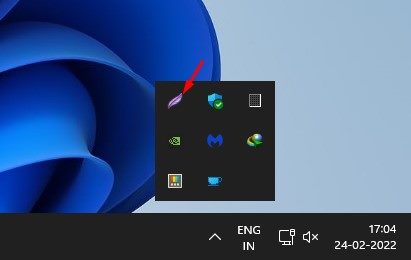
3 Click on the Lightshot icon and choose the location you wish to capture.
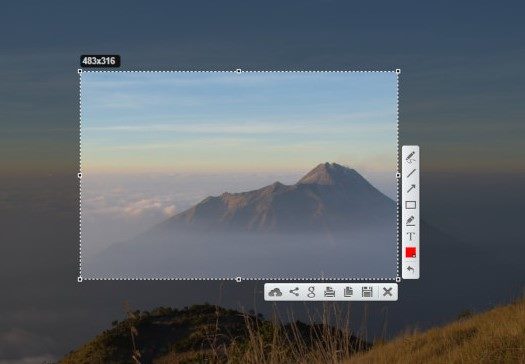
4 When done, you can modify the picture or produce an instant sharable link.
7 Use Third-Party Screenshot Utilities
Lightshot is not the only third-party screenshot tool offered for Windows. There are several other choices.
Third-party screenshot devices for Windows enable you to manage your screenshots better. As an example, you can make use of screenshots, include messages, and more promptly after capturing them.
Likewise, several Windows screen recording tools allow you record screenshots. For a list of the very best screenshot devices, examine our guide– Ideal Windows Screenshot Devices
Likewise Read: 10 Finest Screen Recorder for Windows 11
You obtain plenty of methods to capture screenshots in Windows 11 You can even make use of other third-party screenshot tools to catch screenshots. I hope this post aided you! Please share it with your friends additionally. If you have any doubts, allow us understand in the comment box below.