
If you have actually ever before utilized premium VPN services on your PC, you might learn about the Kill Switch over. Kill Switch is a function that eliminates the net connection in case of an IP Leak or link decrease.
Although Kill Switch over feels like a fantastic VPN feature, you may want to have it on your Windows tool. The benefit of having a Kill Switch Over in Windows is that you can immediately close the internet connection.
What’s the requirement for a Kill Change?
Kill Change can aid you in numerous methods. You can use it to shut the net connection whenever you sense questionable activity on your web connection.
So, it has multiple uses and works as a panic button. You can utilize it to get out of circumstances when you require to pull the ethernet cord. So, the Eliminate button is among the most effective and simplest means to remove net connectivity.
Just how to Create an Eliminate Switch Over in Windows
Producing a Kill Switch in Windows 10 is quite easy. You require to comply with several of the easy steps offered listed below. So, let’s look into just how to develop a web kill button in Windows 10
1 Press the Windows Key + I switch on your key-board to open up the Windows Settings app.
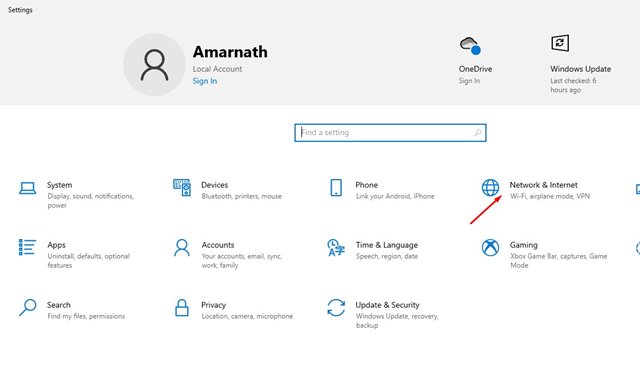
2 On the Setups app, open the Network & & Net option.
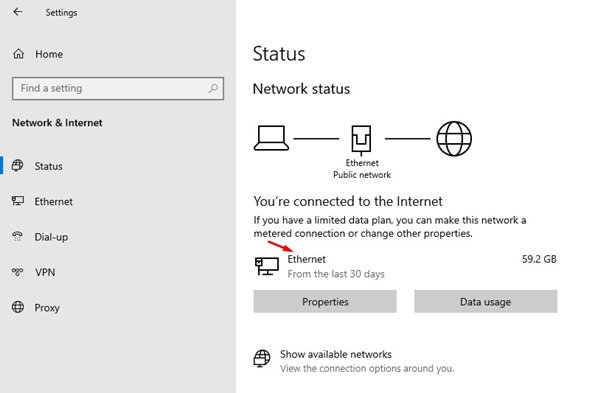
3 Write the network adapter name you are linked to.
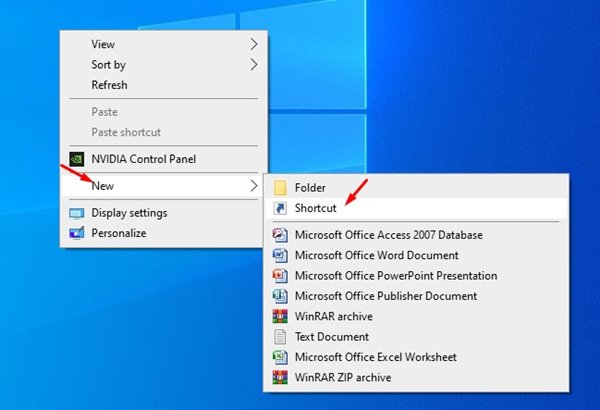
4 Right-click on your desktop computer and choose New > > Faster way
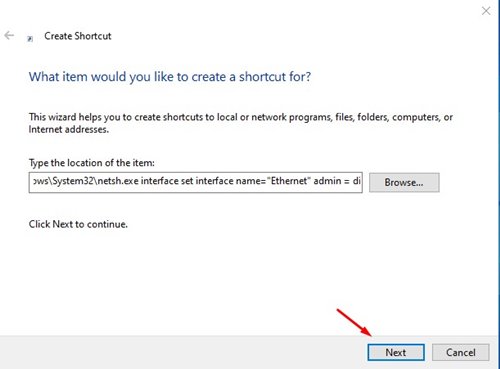
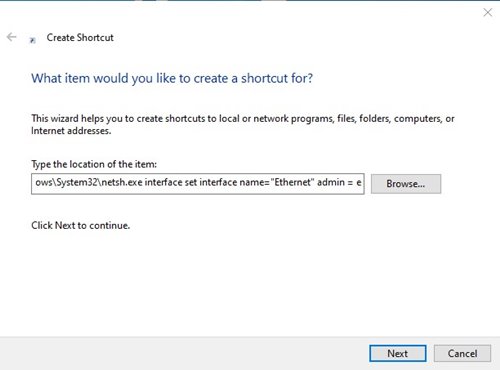
5 On the Faster way dialog box, enter the script:
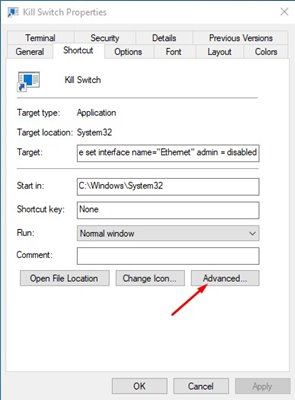
C: Windows System 32 netsh.exe user interface established user interface name="XXXX" admin = disabled
Change the XXXX with the network adapter name that you kept in mind in Step 3
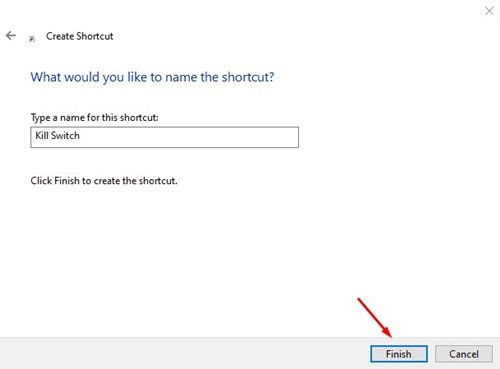
6 As soon as done, click on the Next switch. Next, get in a suitable name for the shortcut. You can name it anything you want, like Kill Change, Quit Internet, etc.
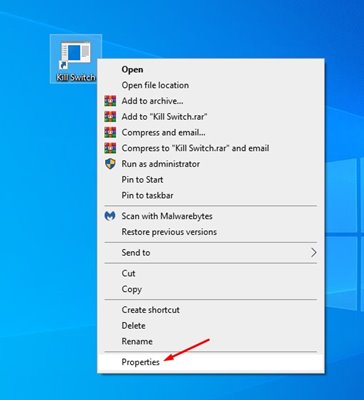
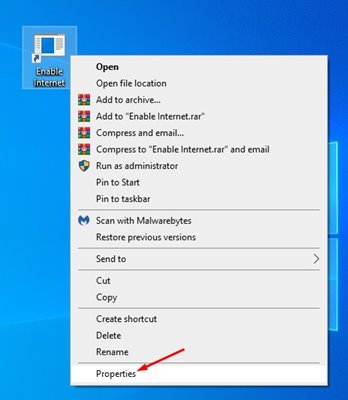
7 Now right-click on the shortcut data and select Properties
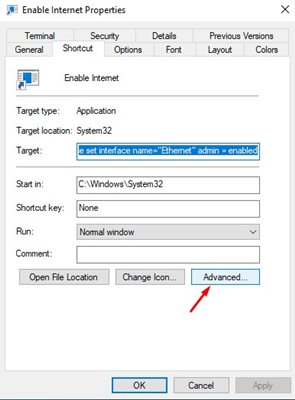
8 Next, click the Advanced switch.
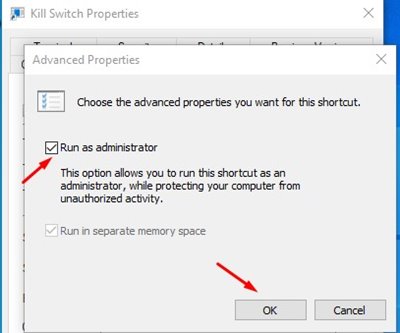
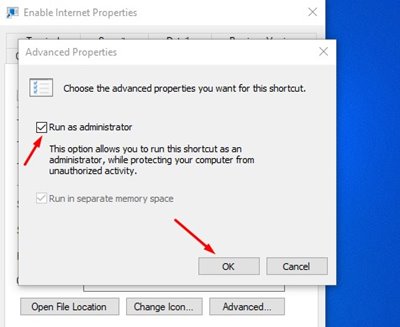
9 Allow the Run as manager choice on the Advanced Residences and click the Ok button.
Exactly how to Develop a Reconnect Change?
If you intend to restore access to the Net, you need to develop a reconnect switch. To do that, comply with the basic steps listed below.
1 Right-click on the desktop and choose New > > Faster way
2 On the Faster way dialog box, go into the manuscript below:
C: Windows System 32 netsh.exe interface set interface name="XXXX" admin = allowed
Change ‘XXXX’ with your network adapter name.
3 When you’ve completed this, click the Next switch, name the faster way Reconnect or Connect to the Net, and click the Complete switch.
4 Right-click on the faster way and select Quality
5 Next off, click on the Advanced choice, as displayed in the screenshot below.
6 On the Advanced Features page, check the Run as administrator choice.
This overview describes how to create a web eliminate switch in Windows 10 I hope it aided. Please share it with your buddies. If you have any kind of inquiries, allow us recognize in the comment box listed below.